You don't have ₹75,000 to hire a designer.
But you absolutely need a professional brand identity to launch your business.
So you're stuck, right?
Wrong.
You can create a professional, premium-looking brand identity yourself. Without hiring anyone. Without design experience.
I'm not talking about "good enough for now." I'm talking about genuinely professional, the kind that commands premium pricing, attracts your ideal customers, and makes you look established.
This guide shows you exactly how to build a professional brand identity without a designer in 7 days, using free tools.
What Is Professional Brand Identity
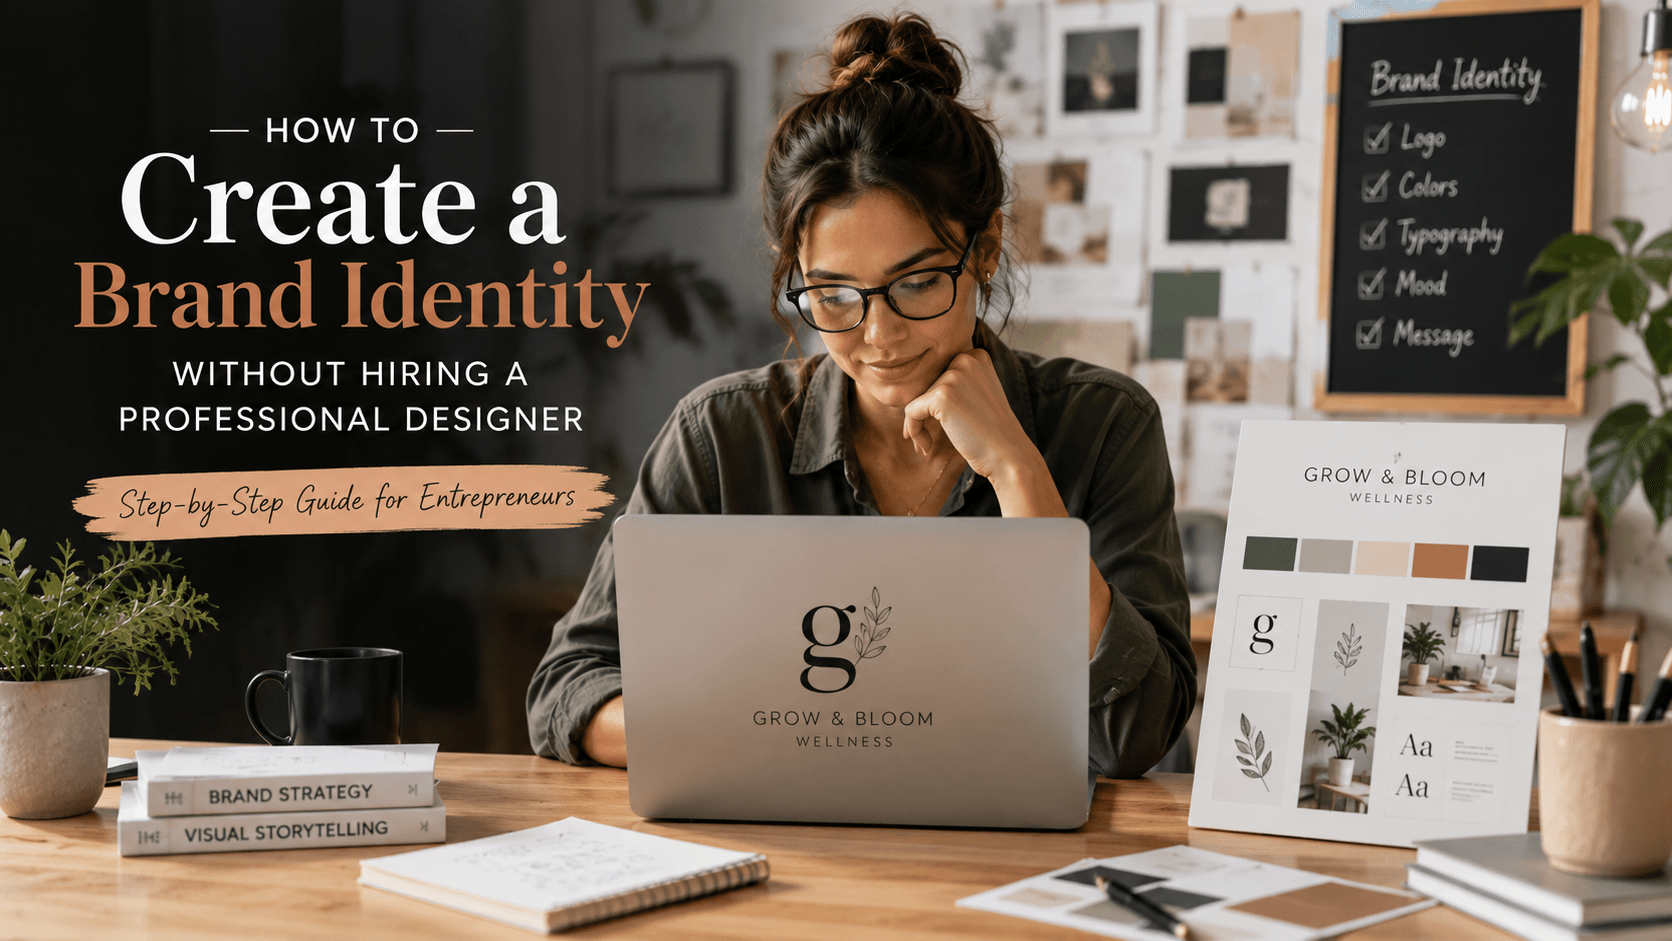
Your brand identity is the visual representation of your business.
It includes:
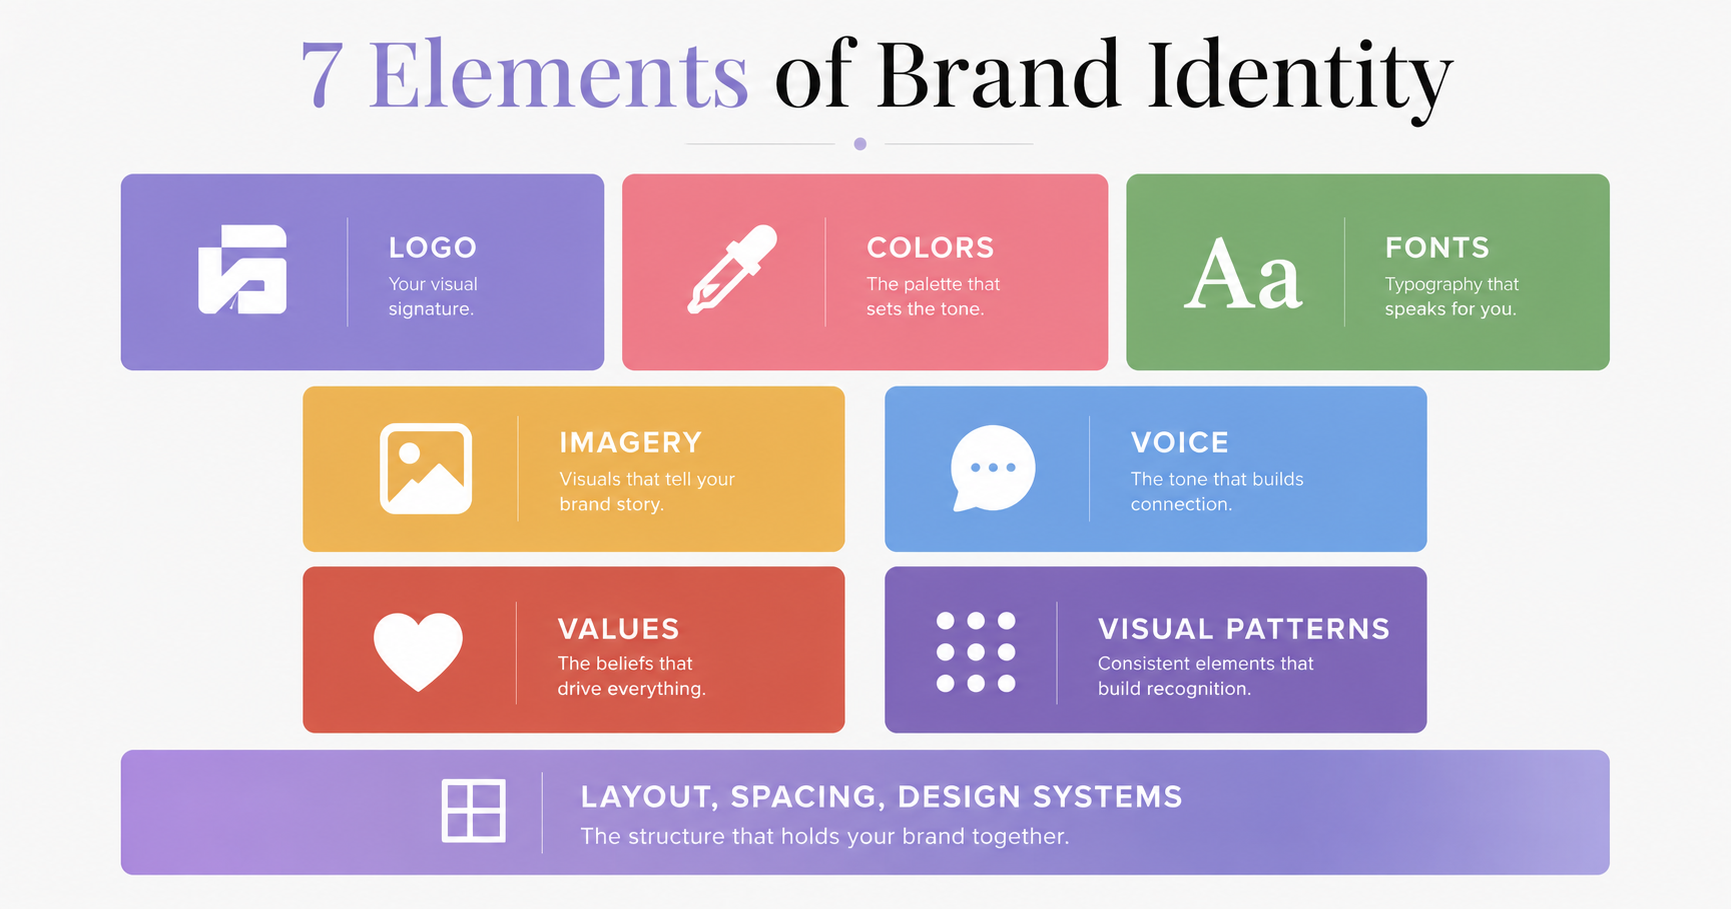
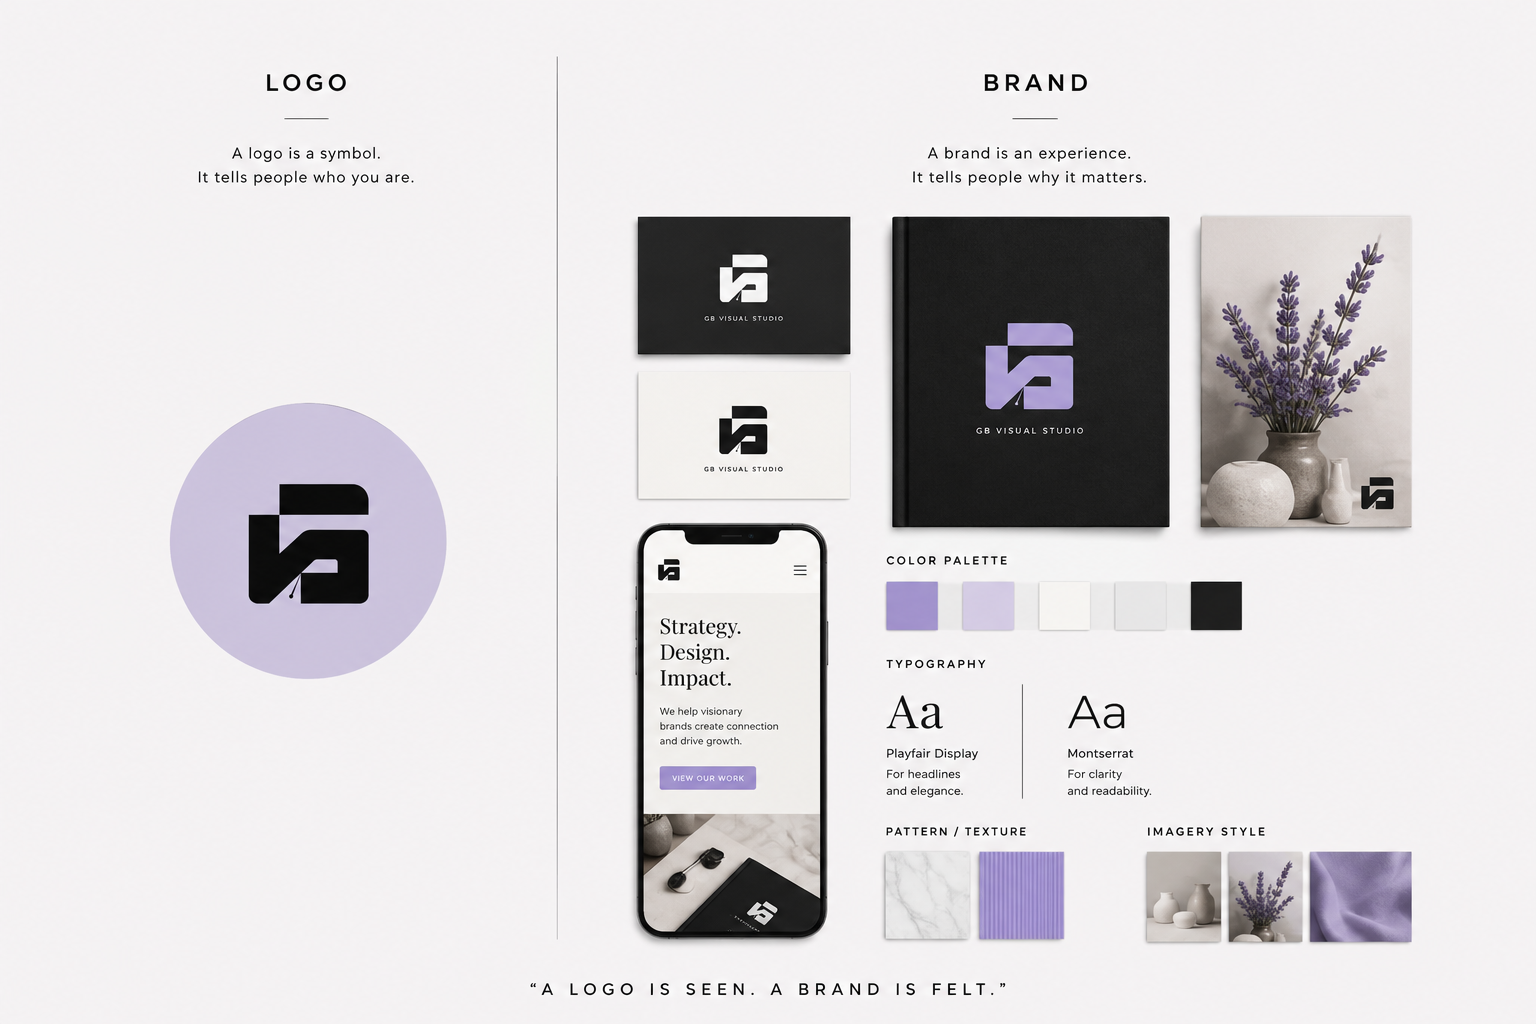
- Logo — Your visual symbol
- Colors — Your signature palette
- Typography — Your fonts
- Photography/Imagery Style — Your visual aesthetic
- Brand Guidelines — How to use these consistently
Together, these elements create a recognizable, professional appearance.
Why does professional brand identity matter?
Because 90 seconds. That's how long someone has to decide whether to trust you.
In that 90 seconds, they see your colors, your logo, your fonts, your overall aesthetic. Their brain makes a subconscious judgment: "This person is professional" or "This person is amateur."
A professional brand identity signals:
- You take yourself seriously
- You're established and credible
- Your work is probably high-quality
- You're worth paying premium rates for
The 5 Essential Elements of Professional Brand Identity
When building a DIY brand identity, you need these 5 core elements:
1. Logo
Your logo is the visual foundation of your professional brand identity.
It doesn't need to be complicated. It should be:
- Simple — Recognizable at small sizes (favicon, app icon)
- Distinctive — Doesn't look like competitors
- Memorable — You remember it after seeing it once
- Timeless — Not trendy, won't look dated in 2 years
DIY Options for Creating Brand Identity Logos:
Option 1: Logo Maker Tools (Free-₹2,500)
- Looka.com — AI-generated logo options
- Brandmark.io — Customizable logo templates
- Designevo.com — Icon-based logo builder
- Canva — Logo design templates (if you have Pro)
How it works: Generate 5-10 logo options in minutes. Test with friends. Pick your favorite.
Cost: ₹0-₹2,500 Quality: Good-to-excellent depending on tool Time: 30-60 minutes Best for: Budget-conscious DIY brand identity creators
Option 2: Hire a Freelancer (₹2,500-₹10,000)
- Fiverr.com or Freelancer.com
- Get 3-5 custom logo concepts
- Cost: ₹2,500-₹10,000
- Quality: Good but variable
Option 3: Canva Pro (₹3,600/year)
- Create your own logo using templates
- Full design control
- Thousands of template elements
- Quality: Good if you have design sense
Quick Test for Your DIY Brand Logo: Can 5 people recognize your logo's shape without your name? If yes, 2. Color Palette (Your Signature Colors)
Create Your Brand Identity This Week
Follow this exact system to create a professional brand.
All 7 days mapped out step-by-step.
2. Color Palette
You need exactly 3 colors for professional brand identity:
- Primary — Your signature color (60% usage)
- Secondary — Supporting color (30% usage)
- Accent — Call-to-action color (10% usage)
These three colors should work together and align with your positioning.
DIY Brand Identity Color Process:
Step 1: Choose Your Primary Color
Think about your positioning:
- Premium/Luxury? Gold, Deep Purple, Emerald Green
- Tech/Modern? Blue, Black, Silver
- Wellness/Natural? Green, Warm Earth Tones, Sage
- Creative/Playful? Vibrant colors (Purple, Coral, Teal)
Step 2: Generate Harmonious Colors
Use free tools to find colors that work together:
- Coolors.co — Generate color palettes instantly
- Adobe Color Wheel — Harmonious color combinations
- Colormind.io — AI color suggestions
Pick a color you like, let the tool generate options, choose 2-3 that complement your primary.
Step 3: Get HEX Codes
Write down the HEX codes for each color. You'll need these for your brand identity documentation.
Example:
- Primary: 2C5F8D (blue)
- Secondary: E8F4F8 (light blue)
- Accent: F39C12 (orange)
Quick Test: Do your 3 colors work together? Print them side-by-side. Do they feel intentional or random?
3. Typography
You need exactly 2 fonts for professional brand identity:
- Display Font — For headings (distinctive, memorable)
- Body Font — For text (readable, professional)
Both should be from Google Fonts (free and professional).
DIY Brand Identity Font Selection:
Step 1: Pick a Display Font
Go to Google Fonts. Filter by "Display." Pick something that feels professional but distinctive:
Premium/Luxury Brand Identity:
- Playfair Display (elegant)
- Cormorant (sophisticated)
Modern/Tech Brand Identity:
- Poppins (clean, friendly)
- Montserrat (geometric)
Creative/Playful Brand Identity:
- Quicksand (friendly)
- Nunito (warm)
Step 2: Pick a Body Font
Filter by "Serif" or "Sans-serif." Pick something readable:
Professional/Safe:
- Inter (clean)
- Roboto (reliable)
- Open Sans (friendly)
Premium Feel:
- Lato (professional)
- Raleway (sophisticated)
Step 3: Test the Pairing
Open Google Docs or Canva. Create a sample page using both fonts.
Do they look like they belong together? Or mismatched?
Recommended Font Pairings for DIY Brand Identity:
| Brand Vibe | Display Font | Body Font | Use For |
|---|---|---|---|
| Premium | Playfair Display | Lato | Coaching, luxury services |
| Modern | Poppins | Inter | Tech, SaaS, apps |
| Professional | Raleway | Open Sans | Corporate, finance |
| Creative | Quicksand | Montserrat | Design, coaching, creative |
| Friendly | Nunito | Roboto | Wellness, education |
Quick Test: Can you read the body text comfortably at 14px? If not, try a different font.
4. Photography/Imagery Style
Choose ONE consistent approach for your professional brand identity photography:
Option 1: Professional Photos (Best Quality)
- Hire a photographer for a half-day shoot
- Cost: ₹10,000-₹50,000
- Quality: Highest
- Best for: If you have budget
Option 2: DIY Photography (Most Authentic)
- Take photos yourself with a good smartphone camera
- Cost: ₹0
- Quality: Medium but authentic
- Best for: Behind-the-scenes, work-in-progress, personal connection
- Tip: Use natural light. Avoid harsh overhead lighting.
Option 3: Stock Photos (Free, Easy, Generic)
- Use Unsplash, Pexels, or Pixabay (completely free)
- Cost: ₹0
- Quality: Good but generic
- Best for: Website headers, backgrounds, minimal imagery
Create Your Brand Identity This Week
Follow this exact system to create a professional brand.
All 7 days mapped out step-by-step.
Option 4: Illustrations/Icons (Customizable)
- Use Canva illustrations or Freepik
- Cost: ₹0-₹2,000/month
- Quality: Customizable, on-brand
- Best for: Decoration, process diagrams, infographics
Critical Rule for Professional Brand Identity: Pick ONE approach. Don't mix professional photos + cheap stock photos. Inconsistency looks disorganized.
Create Your Visual Style Guide:
- Lighting preferences: Bright, moody, or natural?
- Color temperature: Warm or cool tones?
- Subject matter: People, products, or lifestyle?
- Editing style: Vibrant, muted, or minimal?
Gather 20+ images and apply consistent editing. This becomes your visual language.
5. Brand Guidelines Document
A simple 2-3 page document that specifies:
- Logo — Versions, clear space, do's/don'ts
- Colors — Hex codes, when to use each
- Fonts — Names, usage, sizing
- Photography — Style guidelines, examples
- Spacing & Sizing — How things fit together
This is non-negotiable. Without documentation, your brand identity only exists in your head. When you hire someone or scale, they'll guess at your colors.
How to Create Professional Brand Identity in 7 Days
Day 1: Research & Positioning (2 hours)
Before you create any visual brand identity, clarify your positioning.
Step 1: Define Your Positioning
Answer these questions:
- Who do I serve? (specific person, not "everyone")
- What problem do I solve?
- Why am I different from competitors?
- What's my price positioning? (budget, mid-market, premium?)
- What 3 words describe my brand?
Why this matters: Your visual brand identity should reflect your positioning. If you're premium, your colors, fonts, and photos should look premium.
Step 2: Audit Competitors
Look at 5 successful competitors in your space:
- What colors do they use?
- What's their logo style?
- What fonts do they use?
- What's their overall aesthetic?
- Where is the gap? (What are they NOT doing?)
Find a gap. Position your brand identity in the space they're NOT occupying.
Output: A one-page positioning document + competitive audit
Day 2-3: Logo & Colors (4 hours)
Step 1: Create Your Logo
- Go to Looka.com or use Canva
- Generate 10 options
- Pick top 3
- Test with 5 friends: "Guess what I do based on this logo"
- Finalize one
- Get the high-res file
Step 2: Choose Your Color Palette
- Go to Looka.com or use Canva
- Generate 10 options
- Pick top 3
- Test with 5 friends: "Guess what I do based on this logo"
- Finalize one
- Get the high-res file
Output: Your final logo + color palette with HEX codes
Day 4: Typography (2 hours)
Step 1: Pick Display Font
- Go to Google Fonts
- Choose something distinctive + professional
- Examples: Poppins, Playfair Display, Quicksand
Step 2: Pick Body Font
- Choose something readable
- Should pair well with display font
- Examples: Inter, Roboto, Lato, Open Sans
Step 3: Create a Sample
- Open Google Docs or Canva
- Create a sample page using both fonts
- Test readability at different sizes
- Confirm pairing feels intentional
Output: Two fonts selected + specifications (name, sizes, usage)
Day 5: Imagery Style (2 hours)
Step 1: Choose Your Approach
- Open Google Docs or Canva
- Create a sample page using both fonts
- Test readability at different sizes
- Confirm pairing feels intentional
Step 2: Create Your Style Guide
Document:
- Lighting preferences
- Color temperature
- Subject matter
- Editing style
Step 3: Gather Brand Identity Images
- Collect 20+ images
- Apply consistent editing/filters
- These become your visual language
Output: Folder of 20+ images + style guide
Day 6: Brand Identity Guidelines Document (1-2 hours)
Create a simple 2-3 page document:
Page 1: Logo
- Logo image
- Clear space (minimum spacing)
- What NOT to do (don't stretch, don't change colors)
Page 2: Colors
- Color swatches with HEX codes
- When to use each color
- Color combinations that work
Page 3: Typography
- Font names
- Font usage (display for headings, body for text)
- Font sizes
Page 4: Imagery
- Photography style description
- Dos and don'ts
- 3-5 example images
Output: A PDF brand identity guide you can share
Day 7: Implementation (2-3 hours)
Create templates for:
- Email signature
- Social media graphics (Canva template)
- Website mockup
- Business card mockup
- LinkedIn header
Use these across all platforms.
Total Time Investment: 10-12 hours Total Cost: ₹0-₹5,000 (depending on tools) Result: A professional brand identity
Free Tools You'll Need for DIY Brand Identity
| Tool | Purpose | Cost | Alternative |
|---|---|---|---|
| Canva | Graphic design + templates | Free or ₹3,600/year | Adobe Express |
| Google Fonts | Free fonts | Free | DaFont |
| Coolors.co | Color palette generator | Free | Adobe Color |
| Looka.com | Logo generator | Free (basic) | Brandmark |
| Figma | Design tool | Free | Adobe XD |
| Google Docs | Documentation | Free | Notion, Word |
Total cost if you use all free versions: ₹0
5 Critical Mistakes When Creating DIY Brand Identity
Mistake 1: Choosing Colors You Love Instead of Colors That Match Your Positioning
❌ Wrong: "I love pink, so I'll make it my brand color"
✓ Right: "My positioning is premium wellness, so I'll choose sophisticated sage green + cream"
Your brand identity colors should reflect what you're selling, not just your personal preferences.
Mistake 2: Using Too Many Fonts
❌ Wrong: "I'll use 4 different fonts to look creative"
✓ Right: "One display font + one body font used consistently"
Too many fonts look amateur. Professional brand identity uses 2 fonts maximum.
Mistake 3: Mixing Professional Photos with Cheap Stock Photos
❌ Wrong: Professional photo of you + low-quality generic stock photos
✓ Right: One consistent photography style throughout
Inconsistency in your brand identity makes you look disorganized.
Mistake 4: Not Testing Your Logo at Small Sizes
❌ Wrong: Logo looks great at 500px but unrecognizable at 100px
✓ Right: Logo is distinctive at any size
Test your brand identity logo at: 16px, 32px, 64px, 128px, 256px, 512px.
If it's not recognizable at 32px, redesign it.
Mistake 5: Never Documenting Your Brand Guidelines
❌ Wrong: Your brand identity only exists in your head
✓ Right: A 2-page brand guidelines document so anyone can create on-brand content
Without documentation, you lose brand identity consistency as you scale.
When Should You Hire a Designer for Your Brand Identity?
Build DIY brand identity yourself if: ✓ You have 10-15 hours to invest ✓ You have design sensibility (can tell good design from bad) ✓ You're willing to learn tools like Canva ✓ Your brand is straightforward ✓ You're on a tight budget
Hire a designer for your brand identity if: ✗ You need a completely custom logo (not template-based) ✗ Your brand is complex or luxury-positioned ✗ You have zero design sense and don't want to learn ✗ You want professional-grade photography ✗ You need a comprehensive brand identity system
Cost Comparison:
- DIY Brand Identity: ₹0-₹10,000
- Freelancer Brand Identity: ₹25,000-₹75,000
- Professional Brand Identity Agency: ₹150,000-₹500,000+
For most early-stage businesses, DIY brand identity is the right choice initially. Upgrade when you have revenue to invest.